Dynamic Blinkie Text Generator at TextSpace.net

Feedburner

I heart FeedBurner

Selasa, 31 Januari 2017

Update Service Pack 1

Windows 7 Service Pack 1 menambahkan dukungan untuk Vector Extensions Lanjutan (AVX), 256-bit set instruksi ekstensi untuk prosesor, dan meningkatkan IKEv2 dengan menambahkan bidang identifikasi tambahan seperti e-mail ID untuk itu. Selain itu, ia menambahkan dukungan untuk 512e Advanced Format serta tambahan Federasi Identity Services, Windows 7 Service Pack 1 juga menyelesaikan bug yang berhubungan dengan HDMI audio dan lain terkait dengan pencetakan dokumen XPS. Sumber http://en.wikipedia.org/wiki/Windows_7 windows 7 SP1 ini memperbaiki beberapa kelemahan Windows maka computer sobat bisa lebih bak lagi 😀

Ok segera Update Windows 7 Ultimated kita menjadi Windows 7 Ultimated SP1, caranya cukup mudah yuk simak baik-baik saya menggunakan Windows 7 Ultimated X86/32 Bit :

  1. Proses ini memakan waktu kurang lebih 1-2 jam jadi siapkan lah waktu luang sobat
  2. Download file Windows 7 Ultimated SP1 nya terlebih dahulu disitus resmi Microsoft di http://www.microsoft.com/en-us/download/details.aspx?id=5842 pilih lah seperti gambar di bawah untuk Windows 7 Ultimated SP1 32 Bit dan X64 untuk 64 Bit
    Atau langsung klik link http://download.microsoft.com/download/0/A/F/0AFB5316-3062-494A-AB78-7FB0D4461357/windows6.1-KB976932-X86.exe
  3. Setelah proses Download file selesai sekarang tinggal masuk proses instalasi SP 1 nya
  4. Disarankan untuk menutup semua aplikasi yang sedang berjalan agar proses instalasi Service Pack 1 nya lancar
  5. Klik 2 kali file yang telah di download tadi namanya windows6.1-KB976932-X86

  6. Jika muncul pemberitahuan klik YES saja
  7. Pada jendela pertama klik Next untuk melanjutkan instalasi Windows SP 1 ini

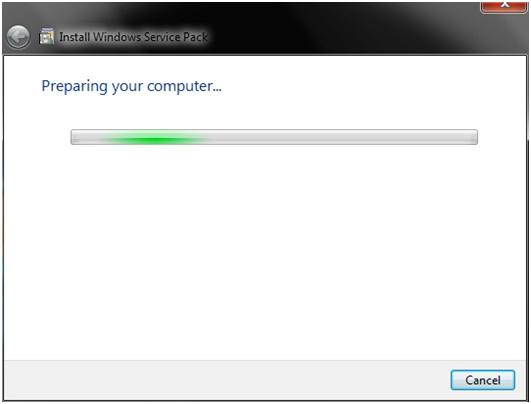
  8. Tunggu hingga persiapan computer untuk instalasi selesai

  9. Langkah selanjutnya tinggal klik install saja

  10. Tunggu hingga proses Creating System Restore Point Windows 7 Service Pack 1 selesai

  11. Pada sesi ini proses instalasi SP 1 mulai berjalan dibutuhkan waktu kurang lebih 1 jam jadi harap bersabar

  12. Setelah selesai computer akan otomatis Restart, kalo tidak bisa klik Restart

  13. Pada proses Restart ada pemberitahuan Jangan Matikan Komputer Yaitu “Preparing to configure windows do not turn off your computer” tunggu hingga 100% compelite
  14. Dan setelah computer hidup kembali pasti ada pesan “Configuring service pack do not turn off your computer” tunggu juga hingga 100% compelite
  15. Setelah masuk Windows pastikan ada pesan yang menyatakan bahwa proses install Service Pack 1 ini sukses, seperti gambar di bawah ini

  16. Itu pun menjelaskan bahwa proses install SP 1 sobat berhasil
  17. Sebelum

  18. Sesudah

Sabtu, 28 Januari 2017

Displaying markers on googl map

http://stackoverflow.com/questions/31856390/displaying-markers-on-google-map-from-mysql-database-using-php-javascript

API KEY GOOGLE MAPS BROWSER


Tutorial Implementasi Google Map Javascript Api Key

Beberapa Minggu terakhir, banyak yang menanyakan lewat WhatApp, Email dan BBM seputar tutorial Google Map API (berbasis web) yang error saat dicoba peta tidak muncul. Biasanya muncul pesan seperti dibawah ini.
Oops! Something went wrong.
This page didn’t load Google Maps correctly. See the JavaScript console for technical details.
Apa penyebabnya? Jika anda ingin tahu buka Chrome Developer pada tab Console dengan shortcut [CTRL]+[SHIFT]+[I] maka akan muncul pesan Seperti dibawa ini atau pesan yang mirip
Google Maps API warning: NoApiKeys https://developers.google.com/maps/documentation/javascript/error-messages#no-api-keys

Google Map API sekarang sudah mengalami beberapa perubahan yang menyebabkan banyak tutorial Google map yang ditulis beberapa tahun yang lalu tidak bisa berjalan.Minimal ada ada dua perubahan yaitu dibagian Struktur Kode Javascript yang harus ada fungi Callbacknya dan Perubahan yang lain adalah API_KEY sekarang sifatnya WAJIB (dulu opsional). Silahkan liat sample script Google map terbaru di Sample Script Google Map.
Contoh sample kode
?
source code
<script>
    var map;
    function initMap() {
      map = new google.maps.Map(document.getElementById('map'), {
        center: {lat: -7.795580, lng: 110.369490},
        zoom: 15
      });
    }
  </script>
  <script src="https://maps.googleapis.com/maps/api/js?key=YOUR_API_KEY&callback=initMap"
  async defer></script>
Perhatikan  ada kata key=YOUR_API_KEY, artinya ganti dengan API key kita sendiri.

Mendapatkan Google Map Javascript API KEY

Untuk mendapatkan Key tersebut silahkan ikuti langkah langkah berikut
  1. Login ke Google Api Console Dengan Akun Gmail Anda.
  2. Create Project sebagai contoh “GoogleMapWeb”
  3. Klik menu Library lalu klik link Google Map Javascript API
  4. Klik Enable Seperti gambar dibawah ini
  5. enableGoogleAPIkeySelanjutnya Klik tombol biru  Go to Credentials
  6. Proses selanjutnya adalah proses Membuat Apikey dengan 3 langkah
    • Langkah ke-1 , memilih jenis Apikey (pilihlah Google Map Javascript API) dan pada combo dibawahnya pilih web Browser (lihat screenshot dibawah ini) lalu klik tombol “What Credentials do I Need?”
      step2credintial
  • Langkah ke-2 Beri nama api key anda misal ‘mymapkey’ , jika anda ingin membatasi agar key tersebut hanya bisa dipakai di satu domain, maka isikan nama domain di kolom berikutnya. (opsional, kosong tidak masalah).
Langkah ke-3 akan muncul API Key anda, silahkan kopi paste di script Google Map anda. apikeydapat

Implementasi API KEY  di Kode Program Google Map

?
source code
<script>
      var map;
      function initMap() {
        map = new google.maps.Map(document.getElementById('map'), {
          center: {lat: -7.795580, lng: 110.369490},
          zoom: 15
        });
      }
    </script>
    <script src="https://maps.googleapis.com/maps/api/js?key=AIzaSyCzEq7EWw1Jk6kyk4ilZ1TqDxxxxxxxx&callback=initMap"
    async defer></script>

Catatan Penting Troubleshooting Google Map

  1. Selalu mengacu ke https://developers.google.com/maps/ untuk referensi Google Map API.
  2. Jika peta tidak muncul atau tidak berjalan sebagai mana mestinya, perhatikan penyebabnya di Chrome Developer Tool [CTRL]+[SHIFT]+[I] di tab Console (selalu gunakan Chrome untuk mendebug). Pesan error dan penyebabnya akan tampak disitu lalu buka halaman https://developers.google.com/maps/documentation/javascript/error-messages untuk mendapatkan solusinya.
  3. Simpan API Key anda dan jangan disebar keorang lain karena key ini dipakai Google untuk mengecek sisa quata harian anda. Limit dari Google Map API adalah 25000 hit perhari.
  4.  Jika anda mendapat script Google map dari tutorial lama konversi script itu menjadi fungsi dengan nama initMap() karena itu fungsi pertama yang dipanggil. Perhatikan di bagian https://maps.googleapis.com/maps/api/js?key=YOUR_API_KEY&callback=initMap.
  5. Jika anda mendapatkan error, biasakan mencari solusinya dengan mengkopas pesan error yang muncul, biasanya anda akan dibawa ke stackoverflow dan cari solusi dengan TANDA CENTANG. insyaAllah itu solusi yang benar.
  6. Belajar bahasa inggris, jangan cuma mengandalkan tutorial bahasa indonesia.

Rabu, 25 Januari 2017

Install Webuzo di linux

Webuzo merupakan salah satu control panel VPS yang saat ini banyak diminati pengguna VPS karena Webuzo merupakan control panel dengan tampilan user friendly dan mudah diinstall.

kali ini saya akan memberi contoh installasi control panel Webuzo di VPS Anda. Untuk yang belum pernah tahu apa itu Webuzo, bisa cek di websitenya langsung di http://www.webuzo.com/

kelebihan webuzo adalah:

  • Tampilannya simpel dan user Friendly
  • Mudah di install
  • terintegrasi langsung dengan auto installer Softaculous
  • Anda dapat menginstall berbagai macam aplikasi web server/database/aplikasi server lainnya dengan mudah dan dapat langsung memilih ingin menggunakan yang mana
  • Gratis (ada yang berbayar juga)


Adapun persyaratan untuk menggunakan Webuzo adalah:

  • VPS dalam kondisi fresh install
  • sudah terinstall YUM / apt-get / tar / wget
  • RAM minimum 512MB (direkomendasikan 1GB)
  • Disk space minimum 5GB (direkomendasikan 10GB)


NB: Kondisi server harus bersih dari installasi PHP, Apache/Nginx/dsb , dan MySQL,Postgre,dsb. Intinya fresh lah, kalau sudah terinstall bisa dihapus dulu Razz

Jika sudah, pertama tam, silakan sambungkan perangkat Anda ke VPS Anda. Silakan buka terminal Anda bila Anda pengguna Linux/Mac, atau silakan gunakan Putty jika Anda pengguna Windows.

Silakan masuk sebagai root di VPS Anda, normalnya begini:

ssh root@IP-VPS-Anda

kemudian silakan jalankan perintah berikut:

wget -N http://files.webuzo.com/install.sh
chmod 0755 install.sh


Perintah itu akan mendownload dan mengubah hak eksekusi file installer webuzo.

Setelah itu silakan jalankan file installernya. Ada beberapa cara untuk menjalankan file installernya.

1. Jika Anda ingin langsung menginstall secara default (akan menginstall Webuzo beserta Apache,MySQL,PHP,DNS service, dan FTP). silakan jalankan:

./install.sh

2. Jika Anda ingin menginstall webuzo dengan spesifik aplikasi, silakan jalankan:

./install.sh --install=lamp,bind

contoh diatas akan menginstall webuzo dengan apache, php, mysql, dan bind (untuk dns). Untuk list lengkapnya silakan cek di http://api.webuzo.com/apps.php

3. Apabila Anda hanya ingin menginstall webuzo saja, silakan gunakan:

./install.sh --install=none

Installernya akan berjalan dengan sendirinya, silakan tunggu hingga selesai.


Setelah itu, silakan kunjungi Installer Webuzo dari browser Anda, silakan kunjungi http://IP-VPS-Anda:2004


Silakan isikan semua detail tersebut:

Username => username akun webuzo Anda, ingat, webuzo itu hanya untuk 1 akun/1 user, sehingga user inilah yang Anda gunakan untuk memanage semua website Anda kelak

Password => password untuk user webuzo Anda

Email => Email utama untuk user webuzo Anda

Lisensi => silakan masukkan apabila Anda sudah membeli lisensi webuzo premium

Domain name => masukkan nama domain utama Anda/isikan alamat IP Anda jika Anda tidak memiliki nama domain

Name Server domain => isikan nama sembarang untuk ns domain Anda

Silakan submit detail tersebut, maka webuzo akan melakukan tugas selanjutnya. Beer!

Dan berikut tampilan setelah Webuzo terinstall:


Webuzo ini memiliki 2 backend, satu untuk halaman admin, satunya untuk panelnya. hampir sama dengan cpanel yang memiliki halaman ke whm dan ke cpanel.

Adapun untuk login ke backend admin silakan akses:

https://IP-VPS-Anda:2005/ (secure)
atau
http://IP-VPS-Anda:2004/ (normal)

dan untuk ke backed panel/user, silakan akses:

https://IP-VPS-Anda:2003/ (secure)
atau
http://IP-VPS-Anda:2002/ (normal)

silakan gunakan detail login yang Anda masukkan sebelumnya tadi.
ini tampilan loginnya:


dan ini halaman panelnya:


Ini video tutorialnya:


Selamat mencoba Beer!

Sabtu, 21 Januari 2017

Adding a Google Map with a Marker to Your Website

https://developers.google.com/maps/documentation/javascript/adding-a-google-map

Adding a Google Map with a Marker to Your Website


Introduction

This tutorial shows you how to add a simple Google map with a marker to a web page. It suits people with beginner or intermediate knowledge of HTML and CSS, and a little knowledge of JavaScript. For an advanced guide to creating maps, read the developer's guide.
Below is the map you'll create using this tutorial.
The section below displays the entire code you need to create the map in this tutorial.
function initMap() {
  var uluru = {lat: -25.363, lng: 131.044};
  var map = new google.maps.Map(document.getElementById('map'), {
    zoom: 4,
    center: uluru
  });
  var marker = new google.maps.Marker({
    position: uluru,
    map: map
  });
}
<h3>My Google Maps Demo</h3>
<div id="map"></div>
#map {
  height: 400px;
  width: 100%;
 }
<!-- Replace the value of the key parameter with your own API key. -->
<script async defer
src="https://maps.googleapis.com/maps/api/js?key=AIzaSyCkUOdZ5y7hMm0yrcCQoCvLwzdM6M8s5qk&callback=initMap">
</script>

Try it yourself

Hover at top right of the code block to copy the code or open it in JSFiddle.
<!DOCTYPE html>
<html>
  <head>
    <style>
       #map {
        height: 400px;
        width: 100%;
       }
    </style>
  </head>
  <body>
    <h3>My Google Maps Demo</h3>
    <div id="map"></div>
    <script>
      function initMap() {
        var uluru = {lat: -25.363, lng: 131.044};
        var map = new google.maps.Map(document.getElementById('map'), {
          zoom: 4,
          center: uluru
        });
        var marker = new google.maps.Marker({
          position: uluru,
          map: map
        });
      }
    </script>
    <script async defer
    src="https://maps.googleapis.com/maps/api/js?key=YOUR_API_KEY&callback=initMap">
    </script>
  </body>
</html>

Getting started

There are three steps to creating a Google map with a marker on your web page:
  1. Create an HTML page
  2. Add a map with a marker
  3. Get an API key
You need a web browser. Choose a well-known one like Google Chrome (recommended), Firefox, Safari or Internet Explorer, based on your platform.

Step 1: Create an HTML page

Here's the code for a basic HTML web page:
<h3>My Google Maps Demo</h3>
<div id="map"></div>
#map {
  width: 100%;
  height: 400px;
  background-color: grey;
}
<!DOCTYPE html>
<html>
  <head>
    <style>
      #map {
        width: 100%;
        height: 400px;
        background-color: grey;
      }
    </style>
  </head>
  <body>
    <h3>My Google Maps Demo</h3>
    <div id="map"></div>
  </body>
</html>
Note that this is a very basic page with a heading level three (h3), a single div element, and a style element which are all explained in the table below. You can add any content you like to the web page.

Try it yourself

At the top right corner of the sample code above are three buttons. Click the left-most button to open the sample in JSFiddle.

Understanding the code

This table explains each section of the above code.
Code and description
<html>
 <head>
 </head>
 <body>
 </body>
</html>

Creates an HTML page consisting of a head and a body.
<h3>My Google Maps Demo</h3>

Adds a heading level three above the map.
<div id="map"></div>

Defines an area of the page for your Google map.
At this stage of the tutorial, the div appears as just a grey block, because you have not yet added a map. It's grey because of the CSS you've applied. See below.
<style>
 #map {
   width: 100%;
   height: 400px;
   background-color: grey;
 }
</style>

The style element in the head sets the div size for your map.
Set the div width and height to greater than 0px for the map to be visible.
In this case, the div is set to a height of 500 pixels, and width of 100% to display the across the width of your web page. Apply background-color: grey to the div to view the area for your map on the web page.

Step 2: Add a map with a marker

This section shows you how to load the Google Maps JavaScript API into your web page, and how to write your own JavaScript that uses the API to add a map with a marker on it.
function initMap() {
  var uluru = {lat: -25.363, lng: 131.044};
  var map = new google.maps.Map(document.getElementById('map'), {
    zoom: 4,
    center: uluru
  });
  var marker = new google.maps.Marker({
    position: uluru,
    map: map
  });
}
<h3>My Google Maps Demo</h3>
<div id="map"></div>
#map {
  height: 400px;
  width: 100%;
 }
<!-- Replace the value of the key parameter with your own API key. -->
<script async defer
src="https://maps.googleapis.com/maps/api/js?key=AIzaSyCkUOdZ5y7hMm0yrcCQoCvLwzdM6M8s5qk&callback=initMap">
</script>
<!DOCTYPE html>
<html>
  <head>
    <style>
      #map {
        height: 400px;
        width: 100%;
       }
    </style>
  </head>
  <body>
    <h3>My Google Maps Demo</h3>
    <div id="map"></div>
    <script>
      function initMap() {
        var uluru = {lat: -25.363, lng: 131.044};
        var map = new google.maps.Map(document.getElementById('map'), {
          zoom: 4,
          center: uluru
        });
        var marker = new google.maps.Marker({
          position: uluru,
          map: map
        });
      }
    </script>
    <script async defer
    src="https://maps.googleapis.com/maps/api/js?key=YOUR_API_KEY&callback=initMap">
    </script>
  </body>
</html>

Try it yourself

At the top right corner of the sample code above are three buttons. Click the left-most button to open the sample in JSFiddle.

Understanding the code

Notice that the above sample no longer contains the CSS that colors the div grey. This is because the div now contains a map.
This table explains each section of the above code.
Code and description
<script>
async defer
src ="https://maps.googleapis.com/maps/api/js?key=YOUR_API_KEY&callback=initMap"
</script>

The script loads the API from the specified URL.
The callback parameter executes the initMap function after the API is completely loaded.
The async attribute allows the browser to continue rendering the rest of your page while the API loads.
The key parameter contains your API key. You don't need your own API key when experimenting with this tutorial in JSFiddle. See Step 3: Get an API key for instructions on getting your own API key later.
<script>
  function initMap() {
  }
</script>

The initMap function initializes and adds the map when the web page loads. Use a script tag to include your own JavaScript which contains the initMap function.
getElementById

Add this function to find the map div on the web page.
new google.maps.Map()

Add this new Google maps object to construct a map in the div element.
{
  var uluru = {lat: -25.363, lng: 131.044};

  var map = new google.maps.Map(document.getElementById('map'), {
    zoom: 4,
    center: uluru
  });
}

Add properties to the map including the center and zoom level. See the documentation for other property options.
The center property tells the API where to center the map. The map coordinates are set in the order: latitude, longitude.
The zoom property specifies the zoom level for the map. Zoom: 0 is the lowest zoom, and displays the entire earth. Set the zoom value higher to zoom in to the earth at higher resolutions.
var marker = new google.maps.Marker({
  position: uluru,
  map: map});

Add this code to put a marker on the map. The position property sets the position of the marker.

Step 3: Get an API key

This section explains how to authenticate your app to the Google Maps JavaScript API using your own API key.
Follow these steps to get an API key:
  1. Go to the Google API Console.
  2. Create or select a project.
  3. Click Continue to enable the API and any related services.
  4. On the Credentials page, get an API key (and set the API key restrictions).
    Note: If you have an existing unrestricted API key, or a key with browser restrictions, you may use that key.
  5. To prevent quota theft, secure your API key following these best practices.
  6. (Optional) Enable billing. See Usage Limits for more information.
  7. Copy the entire code of this tutorial from this page, to your text editor. If you don't already have a text editor, here are some recommendations: You can use: Notepad++ (for Windows); TextEdit (for macOS); gedit, KWrite, among others (for Linux machines).
  8. Replace the value of the key parameter in the URL with your own API key (that's the API key that you've just obtained).
    <script src="https://maps.googleapis.com/maps/api/js?key=YOUR_API_KEY&callback=initMap"
      async defer>
    </script>
    
  9. Save this file with a name that ends with .html, like google-maps.html.
  10. Load the HTML file in a web browser by dragging it from your desktop onto your browser. Alternatively, double-clicking the file works on most operating systems.

Tips and trouble-shooting

  • Use the JSFiddle interface to display HTML, CSS and JavaScript code in separate panes. You can run the code and display output in the Results pane.
  • You can tweak options like style and properties to customize the map. For more information on customizing maps, read the guides to styling, and drawing on the map.
  • Use the Developer Tools Console in your web browser to test and run your code, read error reports and solve problems with your code.
    Keyboard shortcuts to open the console in Chrome: Command+Option+J (on Mac), or Control+Shift+J (on Windows).
    Sources : https://developers.google.com/maps/documentation/javascript/adding-a-google-map